
Discordで立ち絵を横に並べてはねさせる方法
以前、こちらの記事で「Discordで立ち絵を跳ねさせる方法」を紹介しましたが、今回は新しい方法で光らせたいと思います。
Discordを起動しよう
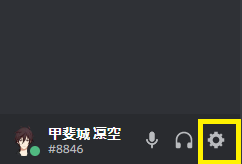
左したのウィンドウより、歯車を選びます。
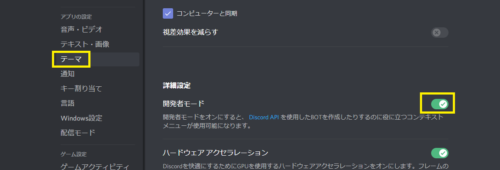
次に”テーマ→開発モード”をONにします。
Discordで光らせる人のURLを取得する
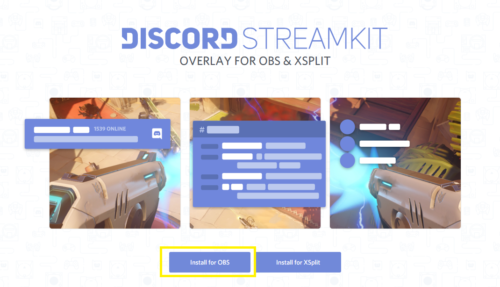
Discord StreamKit Overlayにアクセスします。
Install for OBSをクリックしましょう
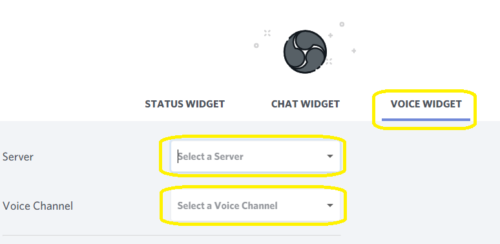
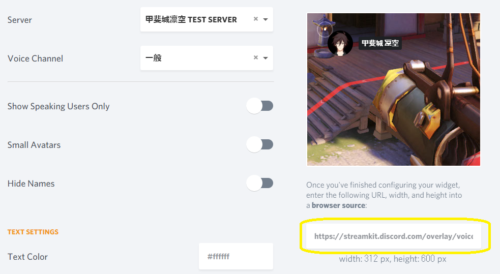
1、VOICE WIDGETを選択します。
2、配信等で使用するServerを選択します。
3、サーバー内で使用するルーム(通話)チャンネルを選択しましょう。
設定が終わったら画面右下にあるアドレスをコピーしておきます。
これは後で使うので、メモしておきましょう。
OBSに取得したURLを追加する
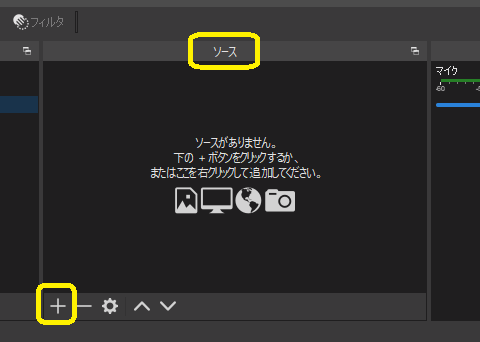
OBSを起動します。
ソースから+ボタンを押します。
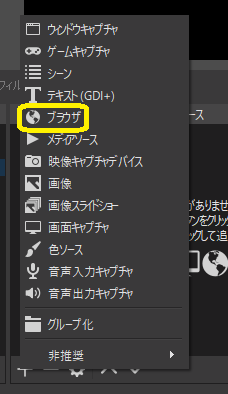
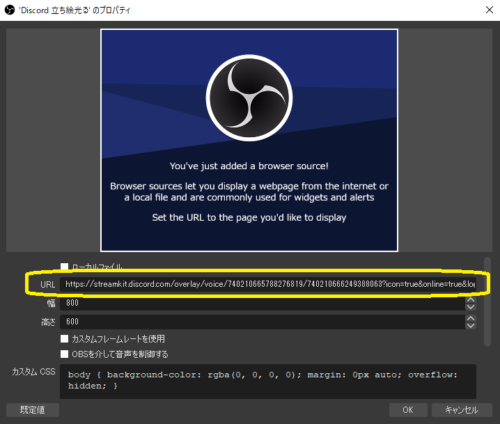
ブラウザを追加します。
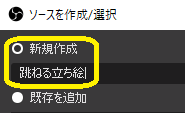
ソース作成で、新規作成を選び、名前は自分の好きな名前を入れましょう。
ここではDiscord 跳ねる立ち絵になってますが、自分の分かりやすい名前を入れましょう。
URL部分に先程Discord StreamKit Overlayで作ったURLを貼り付けます。
カスタムCSSの設定を追加する
カスタムCSSという部分に以下の設定を貼り付けます。
/******カスタムCSS******/
/*アバターの大きさと明るさを決めるよ あと線を消してるよ*/
.avatar {
height:57px !important;
width:57px !important;
border-radius:10px !important;
filter: brightness(70%);
}
/*しゃべったときの状態の設定してるよ*/
.speaking {
border-color:rgba(0,255,0,0.7) !important;
position:relative;
animation-name: speak-now;
animation-duration: 5000ms;
animation-fill-mode:forwards;
filter: brightness(100%) ;
}
/*しゃべってるときのアニメーションの設定だよ*/
@keyframes speak-now {
0% { bottom:0px; }
5% { bottom:10px; }
10% { bottom:0px; }
15% { bottom:10px; }
20% { bottom:0px; }
25% { bottom:10px; }
30% { bottom:0px; }
35% { bottom:10px; }
40% { bottom:0px; }
45% { bottom:10px; }
50% { bottom:0px; }
55% { bottom:10px; }
60% { bottom:0px; }
65% { bottom:10px; }
70% { bottom:0px; }
75% { bottom:10px; }
80% { bottom:0px; }
85% { bottom:10px; }
90% { bottom:0px; }
95% { bottom:10px; }
100% { bottom:0px; }
}
/* アバター及びネームタグ表示位置調整だよ*/
/*  アイコンの幅 default width:70; */
li.voice-state{
width: 90px;
height: 90px;
position: static;
display: inline-block;
}
.user{
background: rgba(0,0,0,.7);
padding: 4px 5px 0px !important;
border-radius: 4px;
display: inline-block;
}
span.name{
display: inline-block;
position: relative;
/* 名前を増やす項目 */
width: 75px;
height: 17px;
line-height: 17px !important;
white-space: nowrap;
text-overflow: clip;
text-align: center;
background-color: rgba(0,0,0,0) !important;
padding: 0 !important;
overflow: hidden;
}
body {
background-color: rgba(0, 0, 0, 0);
margin: 0;
padding: 0;
overflow: hidden;
}
/******カスタムCSS終わり******/
設定項目をOBSの設定部分に貼り付ける。

これで指定したDiscordの通話チャンネルに人が出入りしたとき、自動で追加され、自動で退出されます。
以上です、お疲れさまでした。
また、番外編も用意する予定です。
閲覧数 2,780 件
What do you think?
You must be logged in to post a comment.